You may have seen my other post about the Technical Considerations of the PYRIKX rocket stove design, but in this post I want to talk about the design features as well as how to actually assemble the rocket stove. These points are going to be intermingled as we go. So stick with me… and let me know if there are lingering questions or if anything doesn’t make sense. Or even if you just have an idea of how we can do it better!
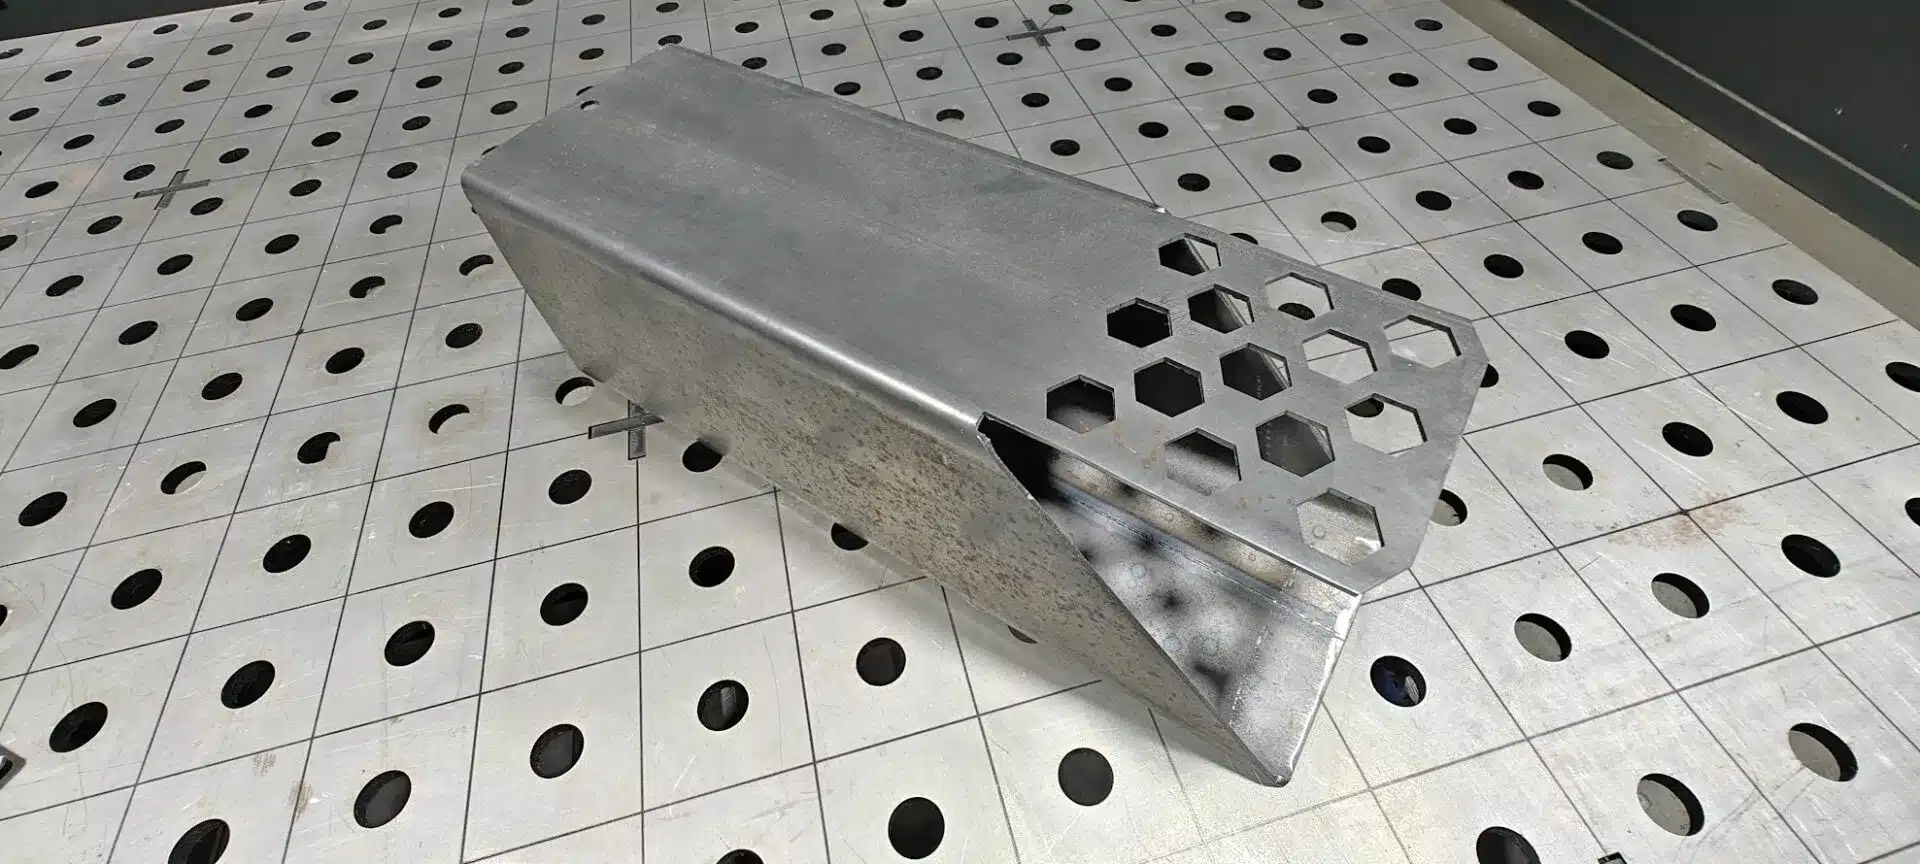
The PYRIKX Rocket Stove Parts
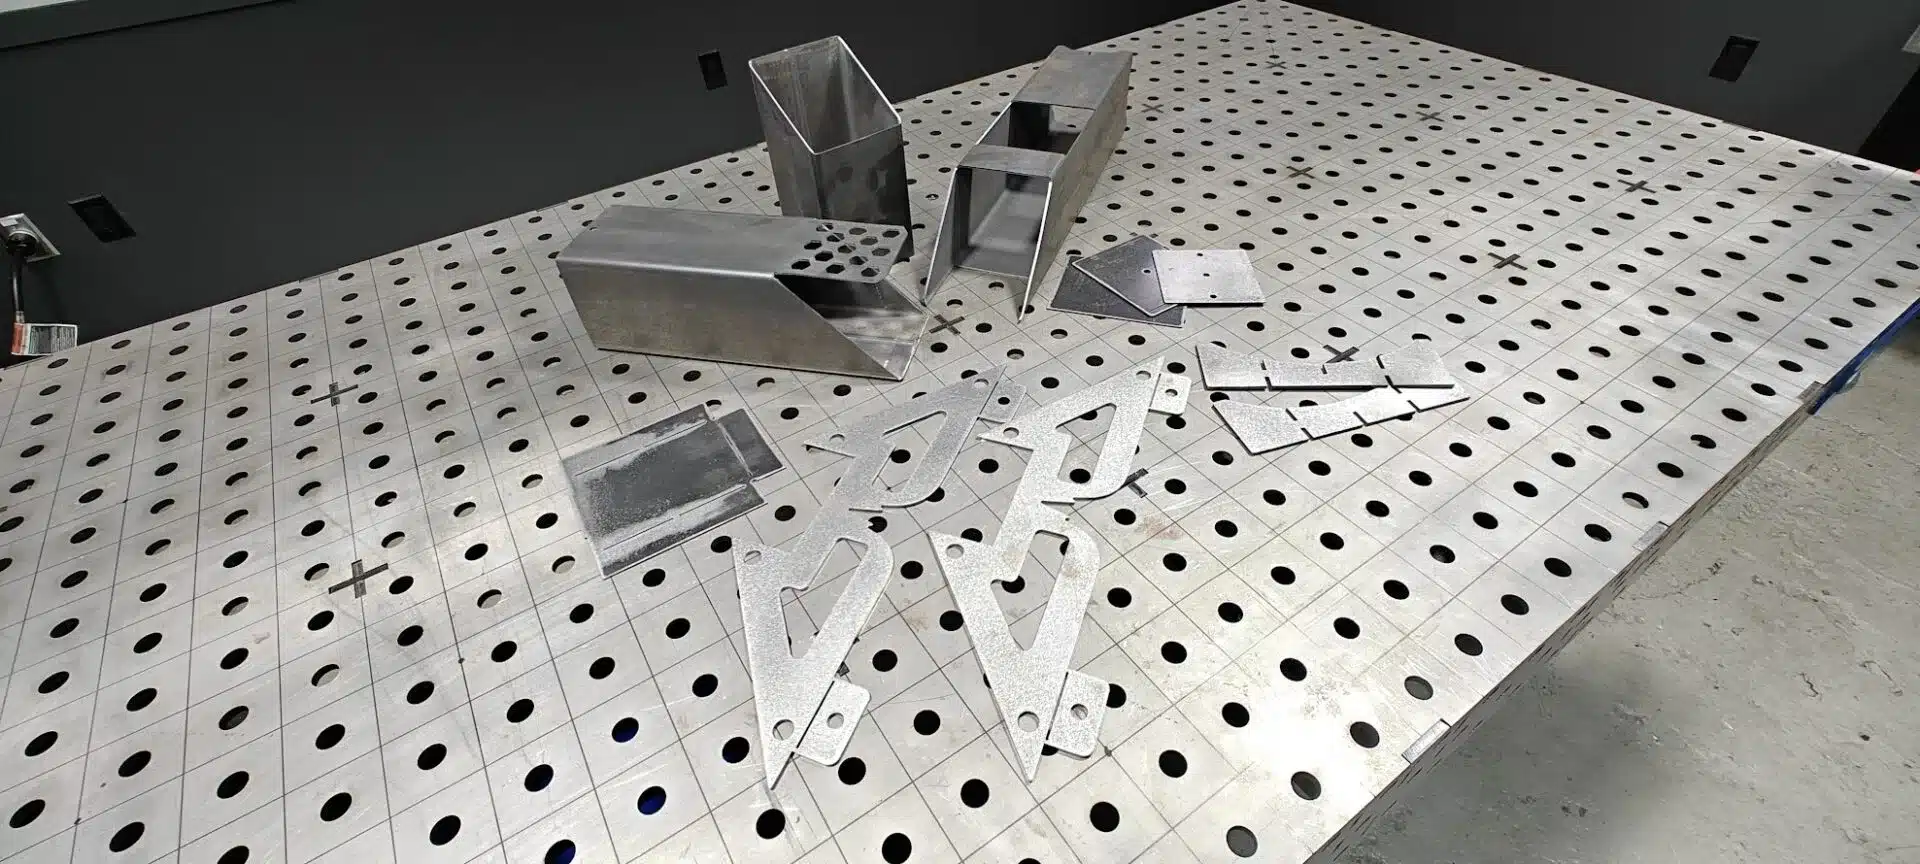
I feel like the number of parts in the kit in the kit is manageable. And I’ve tried to incorporate some design elements which minimize the necessity for additional fabrication.
Top Supports
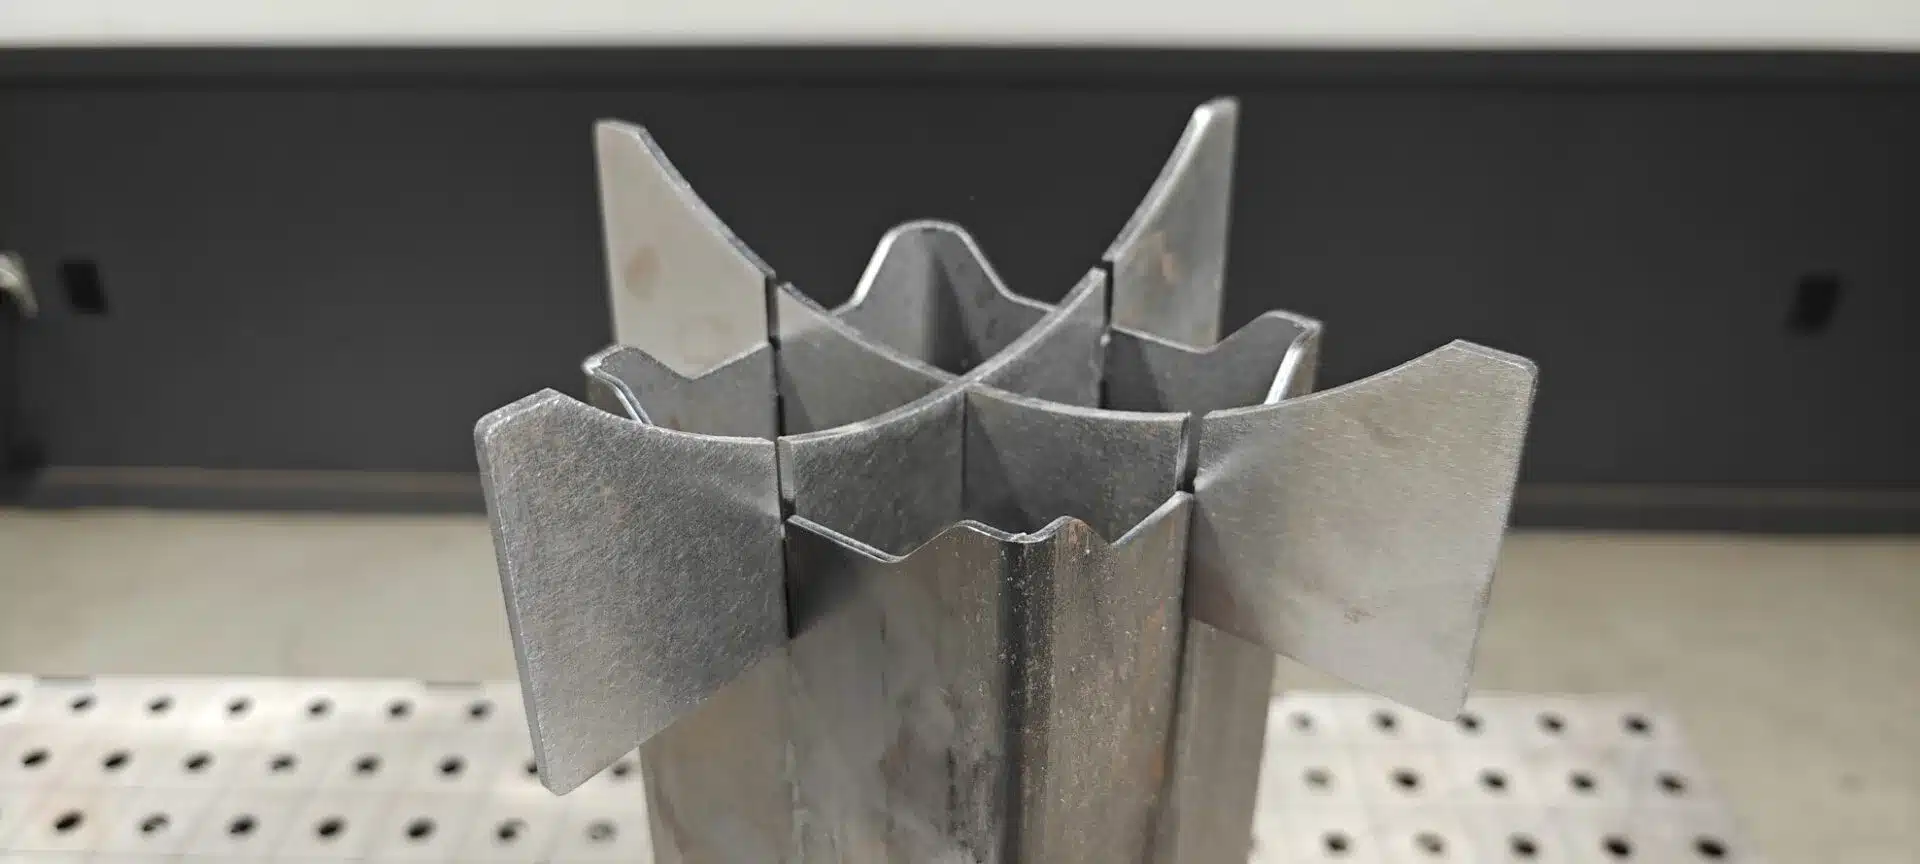
For example, with any rocket stove, if you want to place a pot or skillet on the top to capture the heat, there has to be an air gap for the hot gases to continue to flow. If the top is flat, and you place something over it you simply choke off the air flow and combustion stops.
Since we’re laser cutting the tubing, I incorporated raised corners directly into the design so something can be placed directly on top without impeding the flow of hot air.
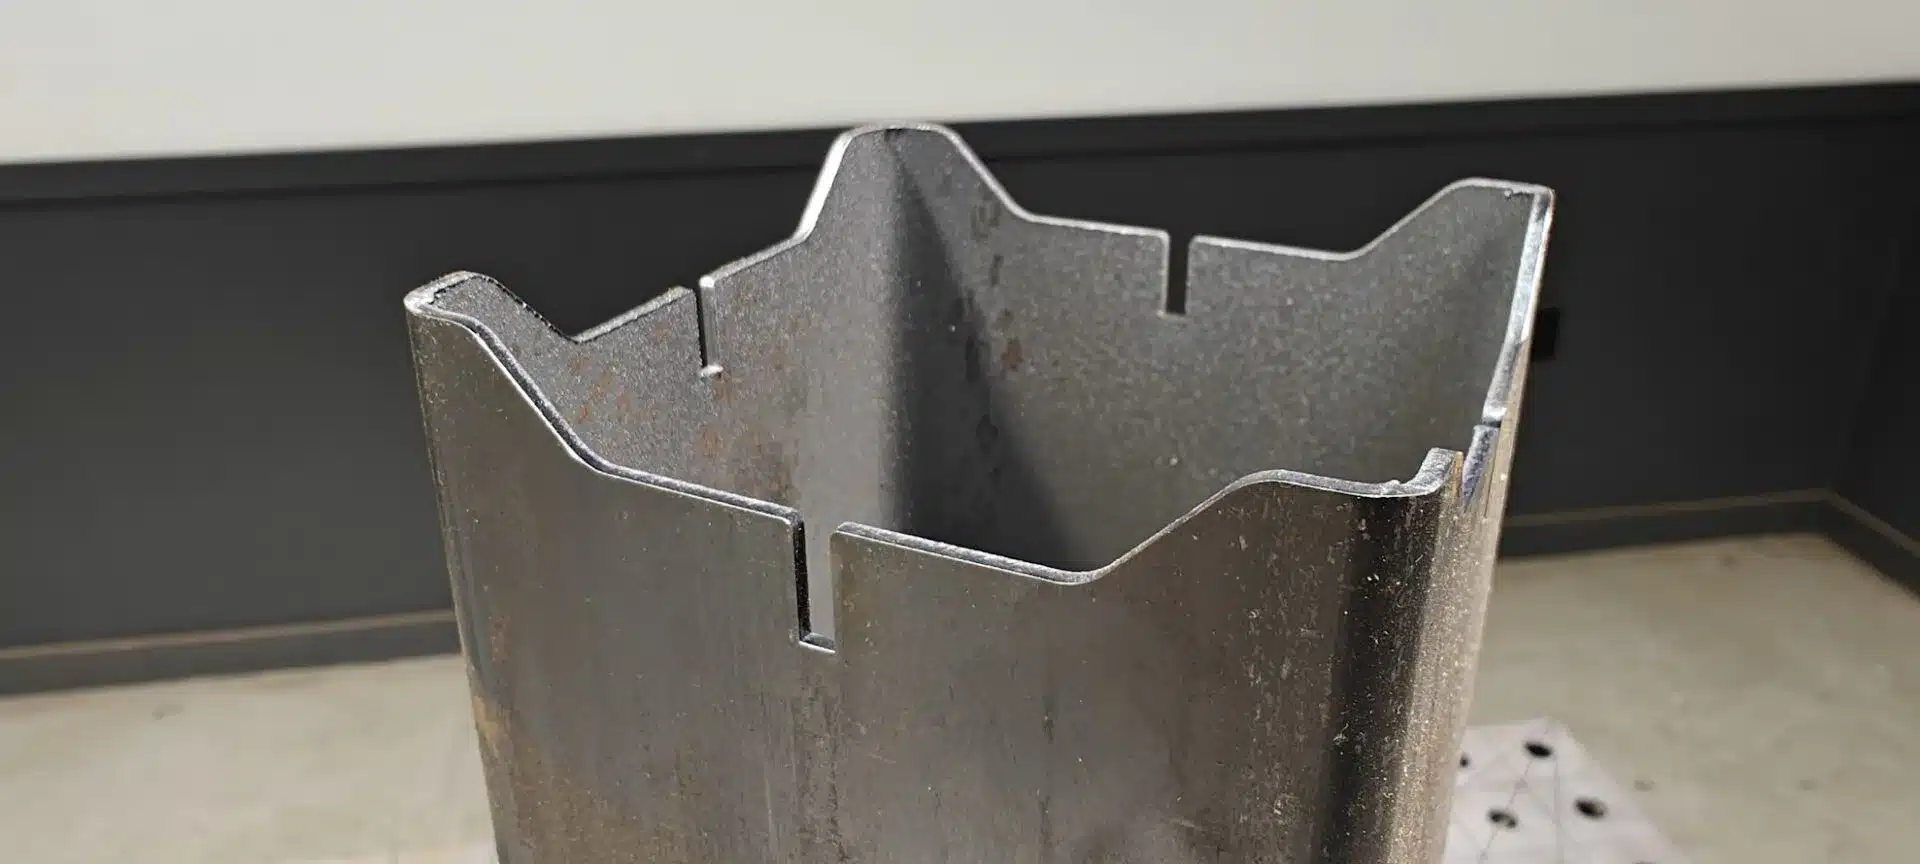
Additionally, there are small slots at the top of the stack to allow expansion grates to be inserted to provide a wider base for things to sit on.
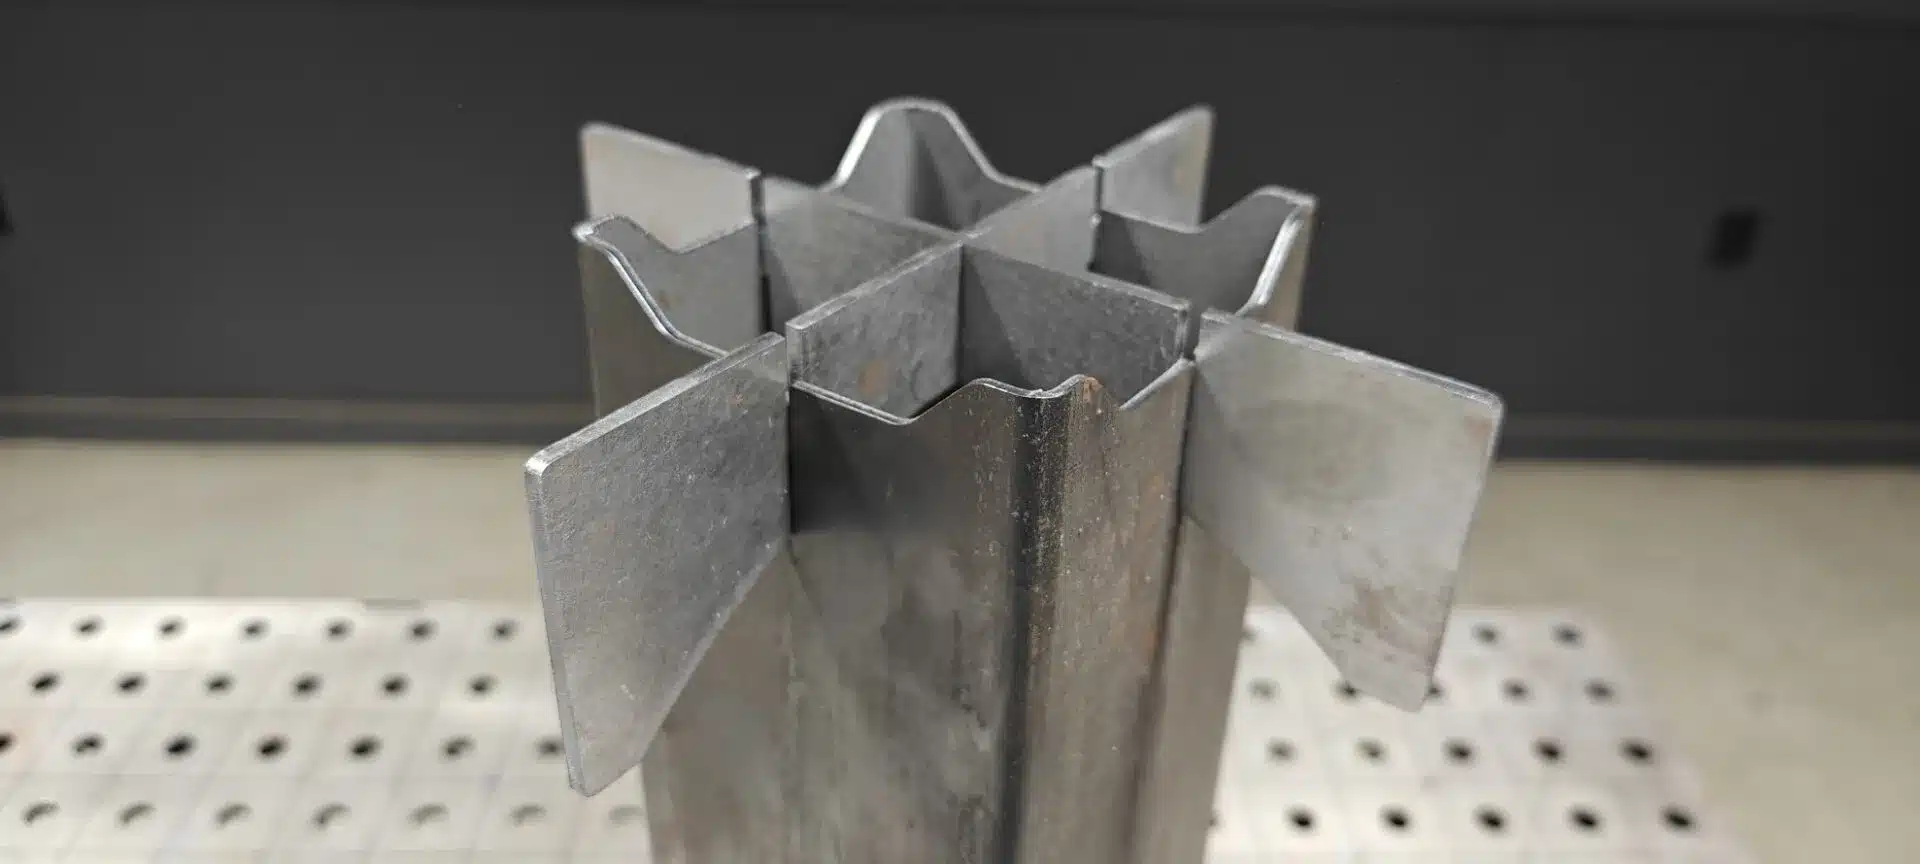
And while we’re at it, I made those slats reversible in case you want to use a wok instead of a flat pan.
Basically, all of these features are built into the design, and there is no fabrication of any kind necessary to use them. So that’s the goal – ease and simplicity.
Integrated Fire Grate
Another example of this is the fire grate. When fuel is dropped into the fuel chamber, it’s going to slide down the 60 degree incline towards the fire chamber. But it needs a grate to prevent it from sliding all the way down into the bottom of the upright stack.
In other designs, if they even incorporate this feature, you’d need to manually fit and weld something in. But again, thanks to the tube laser, when we cut the bottom air inlet tube, we leave the grate integrated to save effort.
Easy to Assemble Ash Tray
When the fuel is spent in the burn chamber, the ashes need a place to go, so they fall through that integrated grate. Now we could have just let them pile up in the lower air intake tube, but then you’d have to pick up the entire stove and shake it just to dump the ash.
Instead, I integrated a removable tray which slides out the back side. Now, this tray has parts that need to be bent, and we could have bent those in our shop on our press brake, but it would add cost and the point is to keep the cost of the kit low, so I designed in little laser cut slits to make it possible to hand bend the parts where necessary.
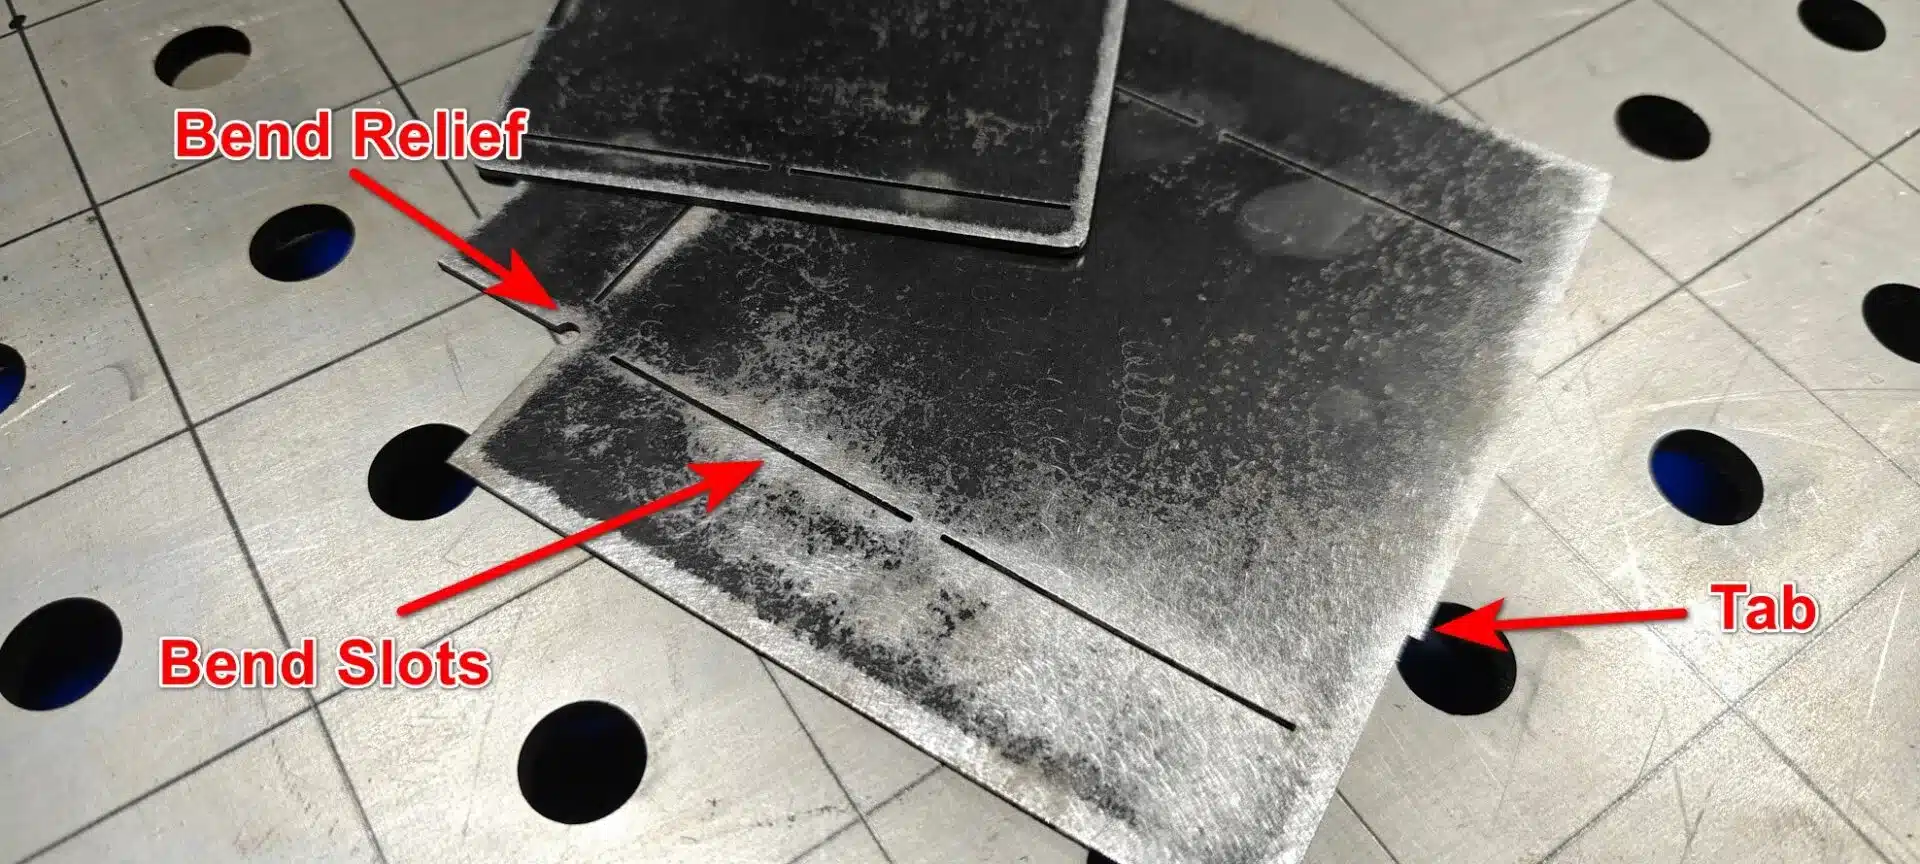
There are also tabs and slots to make it quick and easy to put the bottom tray and the side panel together without having to measure.
This post is getting kind of long. So I’ll come back later with a follow up showing the assembly process. Stay tuned…
John P.
Texas Metal Works
Founder
1 user thanked author for this post.
- You must be logged in to reply to this topic.