Howdy!
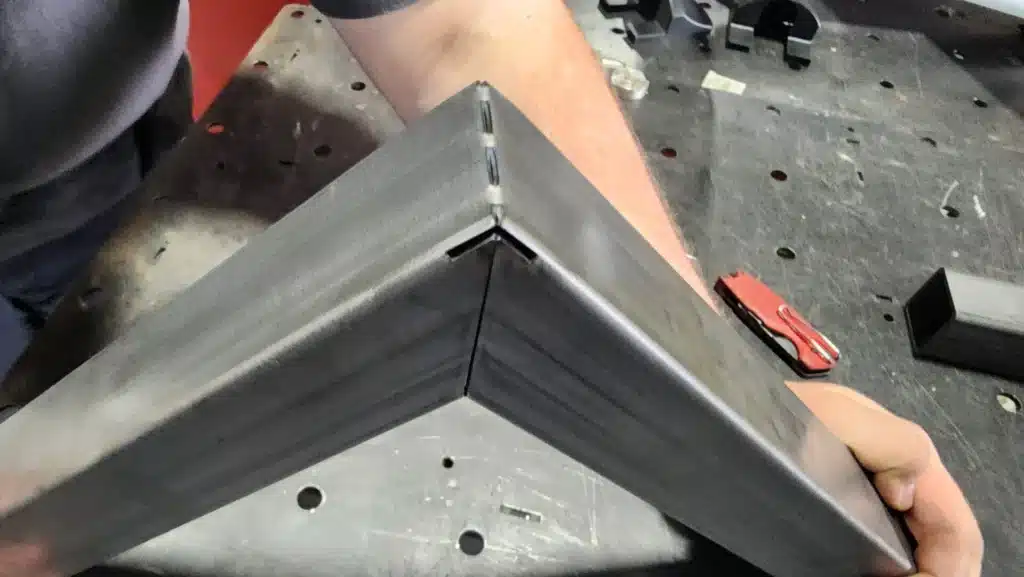
If you’ve ever tried to bend square tubing by hand, you know it’s no easy task. But with the right prep, you can turn a rigid tube into a pliable structure ready for clean, repeatable bends using simple tools. In this guide, we’ll go over a proven method using precision V-notching to make your tubing hand-bendable, along with exact dimensions to get reliable results.
The V-Notch Bending Principle
To allow the tubing to bend manually, we need to make a V-Notch, this notch acts as a stress relief, creating controlled bend zones while the rest of the tubing stays intact.
Key Parameters
The following parameters are for a 2×2″ 16-gauge tubing, that will have a 90° bend.
- Angle: 90°
- Relief Cut Width: 1″
- Relief Cut Thickness: 0.080″

The Relief Cut needs to start where the inner wall of the tubing ends, this Relief Cut is to avoid the material from crushing itself when bending it, making it a lot easier and precise when doing the bending
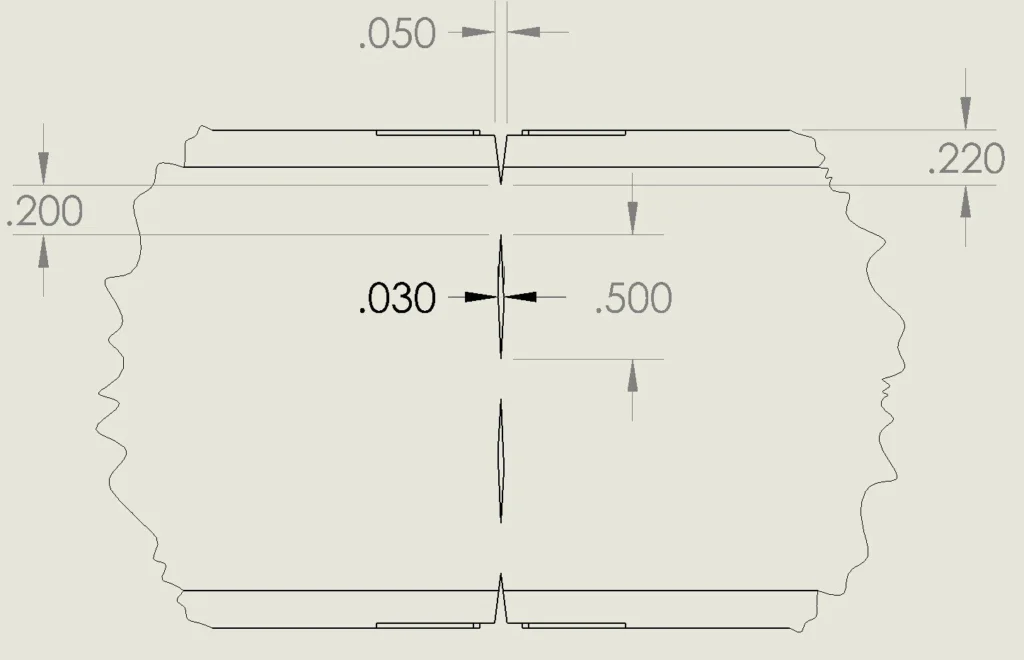
Internal Rib Cutout
Without this cutout, when bending the tubing apart from being harder the rib part can bulge or crack during the bending
That’s where the Internal Rib Cutout comes in.
This cut is placed on the opposite side of the V-notches, right where the internal rib is.
Key parameters
- Outside Cut Width: 0.050″
- Outside Cut Length: 0.220″
- Mid Rib Cut Height: 0.030″
- Mid Rib Cut Length: 0.500″
Why design for Manual Bending
This design approach is to avoid having to manually align and then weld in place corners in a tubular frame or structure
Enables on-site fabrication making it easier and faster to put a structure together
Keeps outer faces of the tubing clean and unbroken
Design Tips
This method is not suitable for high-load structures without doing some testing or FEA simulations
You can use bending jigs for repeatability
This method helps a lot when weird angles are needed
By designing for manual bending, you’re giving fabricators a part that’s ready to assemble with minimal tooling. The end goal is clear: design smart so the shop can just bend and weld.